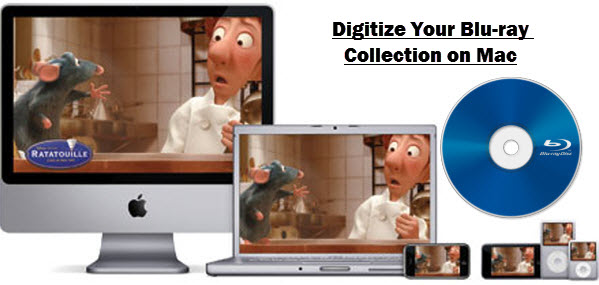
Christmas is coming soon. If you have lots of Blu-ray movies, it is a great idea to convert them to a digital format for watching on your Mac OS X El Capitan or portable media players. Now I'd love to share my experience with you guys the way I solve these issues.
At first, I need a Mac Blu-ray Ripper that can convert Blu-ray to videos bypassing Blu-ray copy protection. Googled bluray ripper reviews to look for the best tool to digitize Blu-ray movies on Mac, I met Pavtube BDMagic for Mac. It is top-ranked in the review with reasonable price. Read the review.
Well I haven't got the chance to try every profile, but it's really the best Blu-ray/DVD backup tool I've met ever; I mean it's ease of use, not fuss and simple to follow. This best Blu-ray Ripper for Mac can rolls off Blu-ray/DVD disc protection, supports lossless 1:1 Blu-ray backup and keeps all the disc titles and chapter structure perfectly on Mac.
Key features of BD Magic for Mac:
* Rip the latest Blu-ray/DVD including 3D blu-ray on Mac
* Directly Copy Blu-ray/DVD main movie with multiple audio and subtitle streams
* Convert Blu-ray/DVD to a variety of video formats
* Full Disc Copy Blu-ray/DVD’s original file structure to BDMV folder
Besides, if you want to lossless backup your Blu-ray/DVD video files with all multiple audio and subtitle tracks, try Pavtube ByteCopy.
Don't you like to have a try?
They provide free trial (no time limitation) before purchase; and you can reach the Windows version here.
Free Download and trail:


Other Download:
- Pavtube old official address: http://www.pavtube.cn/blu-ray-ripper-mac/
- Cnet Download: http://download.cnet.com/Pavtube-BDMagic/3000-7970_4-76177782.html
How to digitize Blu-ray movie with best video quality on Mac OS X El Capitan
Step 1. Run Pavtube BDMagic for Mac and import disc. A Blu-ray drvie is needed for Blu-ray ripping.
Click this icon to load disc from ROM, IFO/ISO or folder. I also noticed if you have a ISO file to import, it will recognize the ISO file automatically with no need to run virtual driver and mount ISO files firstly. Good design.

Step 2. Choose format.
Click "Format" drop-down list and choose proper format for different using.
For instance, if you simply want to back up Blu-ray/DVD to external hard drive, here are two solutions:
1. Click the "computer" icon on the top to output 1:1 Blu-ray/DVD file exactly the same as original.
2. Select "Copy>Directly Copy" in format list to output an intact m2ts file of the main title.
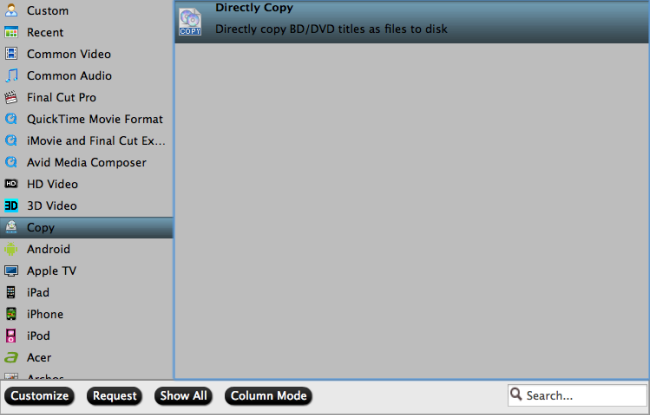
For watching on Home theater PC, TV and other android and apple tablets, you can choose "Common Video > H.264 Video(*.mp4)" or "HD Video > AVI HD Video(*.avi)", it's well compatible with your TV and Tablets.
Step 3. Change video specs. (Optional)
If you are not satisfied with default specs, then click "Settings" to enter Profiles Settings windows. You can customize video frame rate, bitrate, size and other settings freely.
(It does not work for directly copy)
Step 4. Start conversion.
Click the big red "Convert" to start backing up or converting your Blu-rays. Usually backup will be quicker because it does not need to do trancoding.
After the conversion, click "Open output folder" to quick locate converted files. Connect your hard drive to computer and transfer them into it.
Pavtube BDMagic for Mac works easily and at high efficiency. Digitizing Blu-ray Collection on Mac is no long the complicated thing. Now take time to enjoy it.
Further reading:
At first, I need a Mac Blu-ray Ripper that can convert Blu-ray to videos bypassing Blu-ray copy protection. Googled bluray ripper reviews to look for the best tool to digitize Blu-ray movies on Mac, I met Pavtube BDMagic for Mac. It is top-ranked in the review with reasonable price. Read the review.
Well I haven't got the chance to try every profile, but it's really the best Blu-ray/DVD backup tool I've met ever; I mean it's ease of use, not fuss and simple to follow. This best Blu-ray Ripper for Mac can rolls off Blu-ray/DVD disc protection, supports lossless 1:1 Blu-ray backup and keeps all the disc titles and chapter structure perfectly on Mac.
Key features of BD Magic for Mac:
* Rip the latest Blu-ray/DVD including 3D blu-ray on Mac
* Directly Copy Blu-ray/DVD main movie with multiple audio and subtitle streams
* Convert Blu-ray/DVD to a variety of video formats
* Full Disc Copy Blu-ray/DVD’s original file structure to BDMV folder
Besides, if you want to lossless backup your Blu-ray/DVD video files with all multiple audio and subtitle tracks, try Pavtube ByteCopy.
Don't you like to have a try?
They provide free trial (no time limitation) before purchase; and you can reach the Windows version here.
Free Download and trail:
Other Download:
- Pavtube old official address: http://www.pavtube.cn/blu-ray-ripper-mac/
- Cnet Download: http://download.cnet.com/Pavtube-BDMagic/3000-7970_4-76177782.html
How to digitize Blu-ray movie with best video quality on Mac OS X El Capitan
Step 1. Run Pavtube BDMagic for Mac and import disc. A Blu-ray drvie is needed for Blu-ray ripping.
Click this icon to load disc from ROM, IFO/ISO or folder. I also noticed if you have a ISO file to import, it will recognize the ISO file automatically with no need to run virtual driver and mount ISO files firstly. Good design.
Step 2. Choose format.
Click "Format" drop-down list and choose proper format for different using.
For instance, if you simply want to back up Blu-ray/DVD to external hard drive, here are two solutions:
1. Click the "computer" icon on the top to output 1:1 Blu-ray/DVD file exactly the same as original.
2. Select "Copy>Directly Copy" in format list to output an intact m2ts file of the main title.
For watching on Home theater PC, TV and other android and apple tablets, you can choose "Common Video > H.264 Video(*.mp4)" or "HD Video > AVI HD Video(*.avi)", it's well compatible with your TV and Tablets.
Step 3. Change video specs. (Optional)
If you are not satisfied with default specs, then click "Settings" to enter Profiles Settings windows. You can customize video frame rate, bitrate, size and other settings freely.
(It does not work for directly copy)
Step 4. Start conversion.
Click the big red "Convert" to start backing up or converting your Blu-rays. Usually backup will be quicker because it does not need to do trancoding.
After the conversion, click "Open output folder" to quick locate converted files. Connect your hard drive to computer and transfer them into it.
Pavtube BDMagic for Mac works easily and at high efficiency. Digitizing Blu-ray Collection on Mac is no long the complicated thing. Now take time to enjoy it.
Further reading:
No comments:
Post a Comment