Monday, January 6, 2014

Rip DVD to Side-by-Side 3D MP4 for playing on MacOS Sierra

Here is the best solution to convert DVD to SBS 3D MP4 for enjoying the 3D video with the assistant of the 3D DVD Ripper.
Maybe most 3D movie fans would ask the same question to either backup their 3D movies free from physical disks or prepare for future usage such as watching copied 3D movies on 3D player. But how to get them playable on these 3D device and if doing converting, is it will surely leaded to the loss of 3D effect?


"I'm trying to find out if I can rip my 3D DVD's to my HDD and still get 3D playback on them to my TV via my HDMI connection. If so, how exactly would I go about burning them (if there is a certain way), and is there any special software or anything I'll need to play the DVD's back through to do this? I am using MacOS Sierra Mavericks."

To rip DVD to side-by-side 3D MP4 video, Pavtube ByteCopy for Mac is the best 3D/2D DVD to Side-by-Side ripper to assist you with ripping Blu-ray and DVD to side-by-side 3D MP4 format. It can also output the format with multiple audio tracks and subtitles preserving. Windows users could use Pavtube ByteCopy which is specially designed for Windows users to create 3D SBS MP4 video out of 3D/2D Blu-ray/DVD movies.

How to rip 2D/3D DVDs to SBS 3D MP4 on MacOS Sierra Mavericks

1. Add 3D DVD source file to the program.

Download and install the latest MacOS Sierra 3D DVD Ripper onto your computer. Launch it and click "Add Video" icon to load 3D DVD files.


2. Set 3D MP4 format as output

Click "Format" bar and move mouse to "3D Video" column, you can choose "MP4 Side-by-Side 3D Video (*.mp4)" as output format. If you want to output Anaglyph 3D or Top-Bottom 3D, you could choose it according to your specific need.


Tip: You can adjust target video settings and 3D effect.

Click “Settings” which is next to “Format”, free change your target video size, bitrate, frame rate and 3D depth. If you want to get best video quality, pls switch them to “original”.


3. Start rip 3D DVD to SBS MP4 3D

When everything is OK, just press the "Convert" button to start the conversion. It will not take much time. Just wait for the conversion process to get done. Once the conversion finished, you are able to get 3D MP4/MKV/MOV files via clicking "Open" button.

The image below is the Side-by-Side effect when viewing without putting on glass.


When play the 3D MP4 on your TV, You may find it comes up in two screen, just hit the 3D button on your TV, and it will pop up a window saying put on your glasses, choose "OK". Another window appears showing your 3D choice: Side-by-Side. Put on your 3D glasses, and then just enjoy 3D Movies!


You May Also Like:

Friday, January 3, 2014

Stream videos from Galaxy Note 3 onto PS3 via Allshare/DLNA

Most of people may be confused about how to stream videos from Galaxy Note 3 onto PS3 via Allshare/DLNA. This article introduces the way to enjoy Galaxy Note 3 Video files on Sony PS3 with ease.

I want to connect my Samsung Galaxy Note 3 to my PS3. Also i want watch movies and music which is in my ps3 frm my Galaxy Note....is it possible?Thanks!

If you are a Galaxy Note 3 user, you may find Samsung Galaxy Note 3 features the DLNA media sharing support. With its AllShare service, you could easily and quickly share media files between all DLNA-enabled devices in your home over a WLAN.


The post is to show you how to stream and transmit videos and audios from Galaxy Note 3 to PS3 via the media sharing application – AllShare. First of all, you should know that the PS3 takes a role of DLNA player but DLNA server, so it can play movies from Galaxy Note 3 in your digital home but can not stream Galaxy Note 3 videos to other players within DLNA protocols.

To allow PS3 to access media files(movies, videos, music, etc) on your Galaxy Note 3, you must activate media sharing. And before that you need to activate the WLAN feature and add a WLAN profile (which is necessary if you want to use the Samsung Galaxy Note 3's AllShare function.).

If you have ensured all the media files(movies, videos, music, etc) stored on Galaxy Note 3 are supported by PS3 and DLNA, just follow the steps to successfully steam Galaxy Note 3 videos on PS3 via AllShare (DLNA).

Step1: Activate the WLAN feature and add a WLAN profile

(1) How to activate the WLAN feature?
In Idle mode, open the application list and select Settings

(2) How to Find and connect to a WLAN?
1 In Idle mode, open the application list and select Settings

Step2: Activate AllShare and customize its DLNA feature.
Follow the steps:

1. In Idle mode, open the application list and select AllShare.
2. Press → Settings.
3. Adjust the following settings to customize the DLNA feature:


Device name - Enter a name for your device as a media server.
Share video - Turn on video sharing with other DLNA-enabled devices.
Share picture - Turn on image sharing with other DLNA-enabled devices.
Share audio - Turn on music sharing with other DLNA-enabled devices.
Upload from other devices - Set whether or not to accept the upload from other devices.
Default memory - Select the default memory location for saving downloaded media files.
Subtitles - Set to display subtitles.

Step 3: Play Galaxy Note 3 videos on PS3 via AllShare.
(1) Select Galaxy Note 3 as the media server (the one that contains media files) and select a media category and a file. After that you can select PS3 as the media player (the one that will play the media files.)

(2) Control playback using icons of Galaxy Note 3 or PS3.

While some files may not play on the PS3 because of the limited supported media formats. If in that case, you can use an easy-to-use yet comprehensive Galaxy Note 3 Video to PS3 Converter to help you transcode the unsupported files to a more friendly video format for PS3 and DLNA. It has the user-friendly and easy interface and superfast conversion speed especially with CUDA acceleration. Moreover, it will get conversion done in few clicks. Mac Galaxy Note 3 Video to PS3 Converter it right for Mac users.

Both the two programs are 20% off now at Pavtube Back to School Special.

Tips:

PS3 Formats: MPEG, DivX, Xvid, MPG, MP3, WAV, WMA, MP4, JPEG, JPG, BMP, GIF, WMV.

DLNA Video/Audio Formats: Audio LPCM AAC, AC-3, ATRAC 3plus, MP3, WMA9.
AV MPEG2 MPEG-1, MPEG-4*, AVC, WMV9.


How to convert MKV, MOV, AVI, FLV, MTS, M2TS, MPEG, MPG Video to MP4 for Galaxy Note 3 and stream for PS3 viewing?Step 1. Import the source.

Download Video to Galaxy Note 3 Converter onto your computer and purchase it. Install and start it up. Click "Add Video" to load source videos.

Galaxy Note 4 Video Converter

Step 2. Choose "Samsung Galaxy Note(*.mp4)" as the target format.

Click the drop-down list and choose "Samsung -> Samsung Galaxy Note(*.mp4)" as the best format.

Galaxy Note 4 video format

Note that you can click "Settings" beside the list to customize target video size, bitrate, frame rate, sample rate(Hz), etc., such as:
Galaxy Note 4 Video Settings

Step 3. Edit the video files (optional).

This wonderful flash Video to Galaxy Note 3 Converter provides us powerful edit function.

Click the pencil-like icon on the top to open Video Editor window; we can trim, crop, add watermark, deinterlacing or edit audio/subtitles before conversion here.

Step 4. Start the video to Galaxy Note 3 conversion.

After finishing all the steps above, the final step is to start the conversion. Click the "Convert" icon to start converting 1080p/720p Videos (MKV, MOV, AVI, FLV, MTS, M2TS, MPEG, MPG, etc) to MP4 format.

Wait for moments till the conversion complete, then click "Open output folder" to quick locate the converted video.
Now you can sync it and playing on Samsung Galaxy Note 3 and PS3 Via Allshare/DLNA without any format issue and device limitation.

See also:

Wednesday, January 1, 2014

Get MediaCoder Alternative Video Converter to convert video on Mountain Lion and Mavericks

I can't find Media Coder for Mac OS X. If MediaCoder doesn't work for Mac, then is there a similar application that is compatible with Mac OS X? Read this article to get the MediaCoder Alternative Video Converter here to convert video on Mac with high video quality.
MediaCoder is an audio/video batch transcoder, putting together lots of excellent audio/video codecs & tools from the open source community into an all-in-one solution. It's capable of transcoding among different audio/video formats with many extra features. MediaCoder supports all typical video and audio formats, plus support for containers include AVI, MPEG-1, MPEG-2, Matroska & MP4.


But the developer team has NOT release a MediaCoder for Mac version, then, what is this amazing tool can offer you all video solutions are on your Mac computer? Here, we highly recommend you to try Pavtube Video Converter for Mac, which works as the best alternative of MediaCoder for Mac. With this best Video Converter and Editor for Mac, users can finish SD/HD video converting and editing process with fast speed and high video qualtiy. No need to install multiple MediaCoder for Mac programs any more.

This app offers an easy way to transcode virtually all video and audio types, camcorder HD footages and TiVo recordings to desired video/audio format for portable multimedia devices, HD media players or video editing software, such as:

* Devices: iPad Air, iPad Mini 2, iPhone 5S, iPhone 5C, iPhone 5, iPad 4, iPad 3, iPad Mini, iPod 5, etc.

*Players: Apple TV 3, WD TV, PS3, Xbox 360, Popcorn Hour, Xtreamer Ultra, Dune HD Base 3D, Iomega ScreenPlay MX HD Media Player, NETGEAR NeoTV Max Streaming Player(NTV300SL), Asus O!Play Mini Plus, etc.

* Video Editing Softwares: FCP, iMovie, Avid Media Composer, Premiere Pro, etc. Plus, you are allowed to freely customize and personalize the conversion files through its settings and options in order to get an individual output in your own way.

Not all video tools like Pavtube Video Converter for Mac offer so many video editing options in this full-features and powerful video converter. It edits videos by trimming, cropping, splitting videos, add text/image/video watermark as copyright protection, and attach external *.srt, *.ass, or *.ssa subtitles into source media for entertainment. Support perfect audio and video synchronization.

The conversion speed is very fast and it supports batch conversion. It converts multiple video clips at the same time, moreover it can shut down computer after the process is complete, so run the app overnight and you could enjoy the created videos next morning when you are up. Free Download the Mac Version here

Tutorials: Converting Video/Audio on Mountain Lion and Mavericks with ease

Step 1: Load video files to this MediaCoder Converter for Mac Alternative

Download the Pavtube Video Converter for Mac on your computer, install and run the program, add videos.You can choose to import videos or the entire folder by clicking the top left two icons.


Step 2. Choose a proper format.

Click "Format" drop-down list and choose the best preset for you portable device with best video quality. Plenty of presets that can be customized as necessary.


For iPad 3, iPad 4, iPad Mini, iPad Air or iPad Mini 2, the video formats from "iPad" option will meets your demand;

For iPhone, iPhone 4, iPhone 4S, iPhone 5, iPhone 5C, iPhone 5S, the preset from "iPad" option is able to work well.

For those who in demands of playing videos on Android devices, you can always find the one you want in Android preset.

Step 3. Customize video specs(Optional).

You could also click the "Settings" to adjust the video and audio parameters of output files.

In the Video Settings, you can select Encoder, Frame Rate, Resolution (you could define it yourself according to your device) and Bitrate for your movie.

In the Audio Settings, you can select Encoder, Channels, Bitrate and Sample Rate for your movie.

Step 4. Start Videos Conversion on Mac.

You can hit the big red "Convert" to start converting MKV, AVI, VOB, WMV, MPG, Tivo, M4V, FLV, F4V, MTS to MP4 with best video settings on Mac. After the conversion, click "Open output folder" in the conversion window, or "Open" in main interface to quick locate the converted video.

Now, you can transfer these videos to your portable Android/Window 8/Apple device on Mac for smooth playback without any problem. Enjoy your digital life!

MediaCoder for Windows Alternative

Pavtube Video Converter has also Windows version, featuring the same functionality with Mac version. Like the Mac version as better equivalent than MediaCoder for Mac, it's the all Windows solution alternative to MediaCoder for Windows XP/2003/Vista/Windows 7/Windows 8/Windows 8.1.

Tips:

If you have Blu-ray\DVD disks and other video clips, Pavtube Video Converter for Mac for is not enough, you should refer to Pavtube iMedia Converter for Mac. This is an –all-in one program which is a great combination of Blu-ray\DVD ripping program and video converting product as well.

Related Guide:


Which is the better for watching videos - MPlayer or VLC Media Player?
Get the Best Handbrake Equivalent for Win/Mac
Convert MKV to VOB on Mac with Alternative of mkv2vob Mac

From: http://bestvideosolution.blogspot.com/2013/12/alternative-mediacoder-for-mac.html 

Converting MKV to VOB on Mac Mavericks & Montain Lion with Alternative of mkv2vob Mac

Didn't find mkv2vob Mac OS X Mavericks & Mountain Lionversion? Don't worry! Get the Alternative of mkv2vob Mac here to convert MKV to VOB on Mac with high video quality.
Hello guys, I have couple of promo music videos and I was wondering is there a way to transcode these VOB files to MKV. Someone will tell me to try mkv2vob for Windows (Windows 8 included). But is there Mac version for mkv2vob? Or can you recommend me some other software for transcoding mkv to vob on Mac? Thanks in advance!


MKV2VOB is a program which enables you to convert MKV to VOB, AVI, MPG, M2TS and MP4. Those compatible MKV files include x264 video and AC3 audio and the output files are supported by Sony PS3. It supports subtitle.But you only can convert specific MKV files which are with x264 video and AC3 audio, that’s to say, not all MKV files you can import to the MKV2VOB for converting. Also it is only available for Windows platforms, which means you can't convert MKV to VOB on Mac with it.

So the following article just aims to introduce a professional mkv2vob Alternative Mac (Mavericks 10.9 & Mountain Lion 10.8 included).

What is this amazing tool can offer you all video solutions are on your Mac computer? Here, we highly recommend you to try Pavtube Video Converter for Mac, which works as the best alternative of mkv2vob Mac. With this best Video Converter and Editor for Mac, users can finish SD/HD video converting and editing process with fast speed and high video quality, including the MKV to VOB conversion with few clicks. No need to install multiple mkv2vob Mac programs any more.

Get the program with 20% off now at Pavtube Christmas Big Promotion!

This app offers an easy way to transcode virtually all video and audio types, camcorder HD footages and TiVo recordings to desired video/audio format for portable multimedia devices, HD media players or video editing software, such as:

* Devices: iPad Air, iPad Mini 2, iPhone 5S, iPhone 5C, iPhone 5, iPad 4, iPad 3, iPad Mini, iPod 5, etc.

*Players: Apple TV 3, WD TV, PS3, Xbox 360, Popcorn Hour, Xtreamer Ultra, Dune HD Base 3D, Iomega ScreenPlay MX HD Media Player, NETGEAR NeoTV Max Streaming Player(NTV300SL), Asus O!Play Mini Plus, etc.

* Video Editing Softwares: FCP, iMovie, Avid Media Composer, Premiere Pro, etc. Plus, you are allowed to freely customize and personalize the conversion files through its settings and options in order to get an individual output in your own way.

Not all video tools like Pavtube Video Converter for Mac offer so many video editing options in this full-features and powerful video converter. It edits videos by trimming, cropping, splitting videos, add text/image/video watermark as copyright protection, and attach external *.srt, *.ass, or *.ssa subtitles into source media for entertainment. Support perfect audio and video synchronization.

The conversion speed is very fast and it supports batch conversion. It converts multiple video clips at the same time, moreover it can shut down computer after the process is complete, so run the app overnight and you could enjoy the created videos next morning when you are up.

Free Download the Mac Version here ( Note: Please download a dmg file for Mac OS X 10.5 Leopard users.)

Tutorials: Converting MKV to VOB on Mac Mavericks & Montain Lion with ease

Step 1: Load mkv video files to this Alternative of mkv2vob Mac

Download the Pavtube Video Converter for Mac on your computer, install and run the program, add videos.You can choose to import videos or the entire folder by clicking the top left two icons.


Step 2. Choose a proper format.

Click "Format" drop-down list and choose the video format from "VOB Format" option.


Step 3. Customize video specs(Optional).

You could also click the "Settings" to adjust the video and audio parameters of output files.

In the Video Settings, you can select Encoder, Frame Rate, Resolution (you could define it yourself according to your device) and Bitrate for your movie.

In the Audio Settings, you can select Encoder, Channels, Bitrate and Sample Rate for your movie.

Step 4. Start MKV to VOB Conversion on Mac.

You can hit the big red "Convert" to start converting MKV to VOB with best video settings on Mac (Mavericks & Mountain Lion) . After the conversion, click "Open output folder" in the conversion window, or "Open" in main interface to quick locate the converted video.

Now, you can transfer these videos to your portable device for smooth playback without any problem. Enjoy your digital life!

mkv2vob for Windows Alternative

Pavtube Video Converter has also Windows version, featuring the same functionality with Mac version. Like the Mac version as better equivalent than mkv2vob for Mac, it's the all Windows solution alternative to mkv2vob for Windows XP/2003/Vista/Windows 7/Windows 8/Windows 8.1. It can deal with nearly all MKV video files.
 

Related Guide:


From: http://bestvideosolution.blogspot.com/2013/12/alternative-of-mkv2vob-mac.html 

Thursday, December 26, 2013

DRM Converter- Enable iTunes video/music DRM-free for Kindle Fire HDX 7

In this article you would learn how to legally free iTunes videos from DRM protection and record your iTunes video to Kindle Fire HDX 7 for playing with high quality.
Spending the weekend with Amazon’s Kindle Fire HDX 7-inch tablet, it’s easy to see why Amazon has built a commanding lead in the Android tablet space. The Kindle Fire HDX 7-inch (which has a companion 8.9-inch version in the wings), is, for now, the reigning champ in power, performance and screen resolution. Yes, it only matches the Google Nexus 7 in pixels per inch, but no other consumer tablet offers the same mobile CPU: Amazon's tablet also has 2GB of RAM, double the 1GB found in the Nexus 7 and roughly quadruple the memory reportedly found in the iPad Mini.


Meanwhile, in a day of normal use that included reading, shopping, watching video, browsing the web, drawing, playing a console-level game, taking and editing photos, the Kindle Fire HDX 7-inch’s battery lasted throughout the day and night.

And one of the most significant updates to Amazon's ecosystem is the ability to download selected Prime instant videos to your device. I’m happy to report that you can download the videos and, instead of waiting for the download to complete, you can start watching them almost immediately. But when turns to video downloaded from iTunes store, you will find it is not so easy to transfer iTunes movies to Kindle Fire HDX 7 and other android devices as iTunes movies are all protected by DRM (Digital Rights Management). To get iTunes movies playback on Kindle Fire HDX 7, you need to remove DRM protection from iTunes m4v movies in advance, and then you can play them freely.

How to enable iTunes video/music DRM-free for Kindle Fire HDX 7?Step 1: Install the DRM Removal program – Pavtube ChewTune or Pavtube ChewTune for Mac.

(Money-saving Tips:)

ChewTune ($29) + Blu-ray Video Converter Ultimate($65) = Only $75, Save $19

ChewTune for Mac($29) + iMedia Converter for Mac($65) = Only $75, Save $19

ChewTune($29) + ByteCopy($42) = Only $54, Save $17

ChewTune for Mac($29) + ByteCopy for Mac($42) = Only $54, Save $17

Pavtube ChewTune is developed as a professional DRM Removal tool and DRM Video Recorder to help users legally strip off DRM protection from iTunes M4V movies, Amazon Instant Videos and Digital Copy so that you are able to watch almost all DRM movies on multiple smartphones and tablets anywhere you like.

Step 2: Start the Top DRM removal software, hit the "Add video" button and browser the source iTunes videos location for loading.


Note: If you are running a trial version of Pavtube DRM Removal Tool, make sure you have turned off iTunes before running this app to ensure its stability.

Step 3. From the "Format" drop-down list, choose suitable profile for Kindle Fire HDX 7. Here I suggest you choose "Common Video -> H.264 Video (*.mp4)" as output format.


Optional - If you like, you could adjust profile settings including video codec, bitrate, frame rate, etc to get better video and audio quality for watching iTunes m4v movies on Kindle Fire HDX 7.

Step 4. Hit the "Convert" button to start recording iTunes movies. After it finishes, click the "Open" icon to locate the recorded iTunes movie, and you are ready to transfer it to your Kindle Fire HDX 7, it's very eary.

Tip 1: Because of 1:1 video recording, it takes as long as the source movie length to finish the whole ChewTune DRM-free process, so if your source iTunes movies is about 1 hour, ChewTune needs more than 1 hour to complete the iTunes to Kindle Fire HDX 7. So if you wanna get a test before fully purchasing, it's better to select a small sample video for testing.

Tip 2: Since Pavtube ChewTune supports batch processing facility, you could import more than one DRM videos and run overnight, and you would get all videos recorded the next morning. Don't forget to set up Windows power options to never turn off monitor or never let the computer system standby.

Related Articles:

Can't figure out how to view TiVo shows on Kindle Fire HDX 7/8.9?
Put and play new released Blu-ray/DVD movies on Kindle Fire HDX 7
Watch MKV, AVI, VOB, WMV, MPG, FLV, F4V on Kindle Fire HDX 7
Copy iTunes video to Kindle Fire HDX 7/8.9 for playback

From: http://pc-mac-compatibility-issues.blogspot.com/2013/10/put-iTunes-video-on-kindle-fire-hdx-7.html 


Tuesday, December 24, 2013

Convert and Copy Blu-ray movie to Galaxy Tablet/Phone

This guide shows you the easiest way to rip and convert Blu-ray to Galaxy Tablet and Galaxy Phone compatible video formats with best HD video quality so that you can watch Blu-ray movies on Galaxy freely.

I have some blu-ray movies, to be able to copy movies to my harddrive and watch them on my galaxy tablet and galaxy phone when I travel out of the country. What software can do this best? Any suggestions would be appeciated!

If you want to watch Blu-ray on Galaxy Tablet and Galaxy Phone, you will need a tool to convert Blu-ray to Galaxy supported video formats first. There are many programs out there that allow you to convert your Blu-rays to Galaxy playable videos. You may be confused about choosing a most suitable tool. If so, I recommend you try Pavtube Blu-ray Ripper, which is easy to use for editing and conversion and makes great quality for Blu-ray to Galaxy Conversion.

The Blu-ray to Galaxy Converter can help you rip and convert all the Blu-ray/DVD Discs even Blu-ray/DVD iso/ifo image files. I saw the ratings on some websites and it is regarded as the top Blu-ray Ripper in 2013. The output quality is very excellent, and see no difference when compared to playing the discs themselves. Meanwhile the audio/video synchronization is very good, the size of the subtitles too. I have 2 android phones and one galaxy tablet I watch the videos on my galaxy tablet and galaxy phone, this converter can works well for both.

If you're a Mac user, please turn to the equivalent Mac version - Blu-ray Ripper for Mac. Just get it now and follow the steps below to copy Blu-ray movies to Galaxy Tablet and Phone for smoothly playing!

How to Rip Blu-ray movie to Galaxy Tablet and Phone?

Step 1. Run Blu-ray Ripper, as the Blu-ray to Galaxy Converter. Click "Load Files" to import Blu-rays.


It will recognize Blu-ray discs from ROM, Blu-ray ISO/IFO and Blu-ray folders automatically.

Step 2. Choose Samsung Galaxy Tablet/Phone compatible format.

Click "Format" drop-down list to locate all the profile; choose "Samsung -> Samsung Galaxy Tab 3 Video (*.mp4)" or "Sumsung Galaxy S III Video (*.mp4)" or other Galaxy format.


Step 3. Customize video specs.(Optional)

Click "Settings" to set up video size, frame rate, bitrate and other settings.

Tips: If you think the video size and image quality are not suitable for your Samsung smartphone, you can first choose any one of the provided types, then change the settings. Please remember the file size is based more on bitrate than resolution which means bitrate higher results in bigger file size, and lower visible quality loss.

Step 4. Start the Blu-ray to Galaxy Tablet/Phone conversion.

Now hit to big "Convert" button to start the Blu-ray to Galaxy Tablet/Phone MP4 conversion. Wait for some moments, then click "Open output folder" to quick locate the converted MP4 file.


Related Articles:

Convert/Play DVD movies onto Galaxy Tab 3
Transfer iTunes, Digital Copy, Amazon videos to Galaxy Note 3
Put/Copy Blu-ray/DVD ISO Files to Galaxy Note 3 on Mac
Enable Galaxy Note 3 to play MKV/AVI/VOB/Tivo/MPG/WMV/FLV/F4V video

From: http://digital-video-lover.over-blog.com/watch-blu-rays-on-galaxy-tablet-and-phone 

Monday, December 23, 2013

How to copy DVD movies to the Kindle Fire HD on Win/Mac

Wanna play your DVD movies on Kindle Fire HD? It is really difficult for us to find an effective player to resolve all our DVD videos. Actually, with the help of Pavtube DVD Ripper, we can easily deal with DVD playback issues.

The Kindle Fire HD is the second generation of Amazon's Kindle Fire line of color touchscreen tablet computers. It features a new 1280×800 high definition LCD display that brings greater experience on movie watching. Recetly I got my Kindle for watching films or backing up my DVD Collection.


However, as we know, Kindle Fire HD can't play DVD directly because it can't have a DVD drive. Kindle Fire HD supports MPEG4, VP8, H.263 videos. To watch DVDs on my new Kindle Fire HD, I think I need to use a DVD ripping software to help you convert DVD to Kindle Fire HD supported video files such as MP4 format.

After trying a few free DVD converters, finallly I find Pavtube DVD Ripper, (Alternative Mac version) and purchased it so I can watch my DVD's on my new Kindle Fire HD. I chose Pavtube because the interface was very clear and the whole process seemed very straight- forward. It does a great job in ripping my DVD movies no matter from DVD discs, DVD movie folders, or DVD IFO/ISO image files to a common video for my Kindle Fire HD and a HTC cell phone too. Both the two programs are 30% off now.

How to convert DVD to Kindle Fire HD compatible videos files


The below guide uses DVD Converter Windows (Windows 8 compatible) screenshots. The way to rip DVD files to your Kindle Fire HD on Mac is almost the same. Just make sure you ge the right version.

1. Add DVD files to the program

Insert DVD movies into your DVD drive, then click "Load file" button to navigate to DVD movies you want to convert. As you can see, added files can be previewed on the right viewing window. You can adjust the video volume and take snapshots of your favorite movie scenes.


2. Set output options for Kindle Fire HD

Now choose the output format for playback on your Kindle Fire HD. You can get optimized videos for Kindle Fire HD under Format > Android > Amazon Kindle Fire HD H.264(*.mp4). The output videos could fit on your device perfectly. And choose the destination folder to save the converted videos.


Tips:
1. If you want to keep multiple audio tracks and subtitle streams when ripping DVD to MKV, MP4 and MOV, you can try to use Pavtube ByteCopy for Windows or Mac.)

2. You can click “Settings” to tweak the detailed video and audio encoding settings. Or click “Edit” button to trim video into several segments by setting a specific output file size, append special effects, crop video screen area, add text/picture watermark.


3. Start DVD to Kindle Fire HD conversion

After all the above settings, simply click “Convert” button to start converting DVD files to Kindle Fire HD video. Just wait for the converting process to be done. After that, find the converted videos in your output folder and transfer them to your Kindle Fire HD. In this way, you can play DVD files on Kindle Fire HD and enjoy them on the go.

P.S. If you have no idea about Kindle Fire HD file transfer, you can check out the post Synchronizing Your Content files (Videos, Pictures, Music) to Kindle Fire HD to learn more.

Read More:

Kindle Fire HD Video Column
Top 10 Kindle Fire HD FAQs, Tips and Tricks
Top 10 Limitations of the Kindle Fire HD
How to sync iTunes movies, music to Kindle Fire HD
Transfer Digital Copy movies to Kindle Fire HD
Rip/Copy Blu-ray movies to Kindle Fire HD

From: http://1080p-video-tool.blogspot.com/2013/10/convert-dvd-to-kindle-fire-hd.html

Thursday, December 19, 2013

TiVo to MPEG- Free Convert TiVo to MPEG-1/MPEG-2 with the best quality

This article mainly introduces free software for converting Tivo to MPEG. If you are looking for software for free, here is right for you. TiVo is a popular home setup box for recording television programs and movies for later playback. It has the capability to transfer the recordings to your personal computer by using the TiVo Desktop Software application. An issue with the files is that they are not always compatible with other multi-media programs or editing softwares like Adobe Premiere, Sony Vegas, Pinnacle Studio, etc.
 
Q1: I have recently exporting a TV show from my TiVo to my PC using my TiVo home network, but the file is in .TiVo format. Does anyone know the best way to convert this to a avi file or mpeg for editing?


Q2: I need software that will change tivo files to mpeg files for viewing on my computer. I have tried Tivo Decoder, VisualHub, iTivo, and ffMpegX all with not so good results. So is there any program or a method for conversion?

Have you got the similar question when you want to use to view and edit TiVo files? As a result, it is required to convert the TiVo files to a common format that widely supported by media players and editors. e.g. MPEG format. The guide shares with you how to convert TiVo file to MPEG step-by-step.

Part 1: Transfer TV shows from TiVo to PC

To transfer TV shows on any PC, you need to download TiVo Desktop software. When your TiVo is connected to your home network, TiVo Desktop provides you with a list of available shows for transferring to your PC.

You can play TiVo video files using Windows Media Player.

Hints: TiVoToGo Transfers system requirements: TiVo Series2 DVR, TiVo software version 7.1 or later, TiVo Series2 box must be connected to your home network using a wired or wireless USB network adapter.


Part 2: Guide to Converting TiVo to MPEG

At first, for converting .tivo to .mpg, you may have search a lot and find that there are many software with cost, which can help you. If you want free software, Pavtube Free Video DVD Converter Ultimate is right for you. Becides supporting Tivo to MPEG conversion, it is integrated software combined with converting both DVD and videos. And it will support converting them to MKV, AVI, WMV, MOV, MPG, etc.

(P.S If you are a Mac user, you can try Pavtube iMedia Converter for Mac)

Go to download Free Video DVD Converter Ultimate and install it. Then follow me to learn how it works.

Step 1. Import source files.

Click "Add Video" icon to load video, or you can drag and drop it to the software directly. "Load files" icon will allow you to load DVD disc, ISO/IFO and DVD folder.


Note: If you want to import Tivo video, you should import the Media Access Key first.


Step 2. Select output format.

Many video formats in the Format dropdown list, you can choose the one you need. Here, you can choose "MPEG-2 Video (*.mpg)" from "Common Video" Option.


Step 3. Video Editing (optional).

Powerful edit function including Trim, Crop, Add subtitles, etc will give you great experience for conversion. For example, you can use Trim to cut off the prevue of DVD that you don’t want to retain in output videos.


Step 4. Start conversion.

Click "Convert" button to start TiVo to MPEG conversion conversion. Click "Open" button you can find the generated files.

And with the help of CUDA Acceleration and full use of cores, you will have a fast speed.


If you want to convert to more popular portable devices and editing software, Updrade version will give you more great features. You can 1:1 backup DVD or 100% backup the main movie of DVD. Also you can choose to output MP4/M4V files for all portable devices to enjoy videos anywhere.

Good News! Pavtube Release a New Site - multipelife.com with Product Migration and Name Change.
To thanks for your continued support all along our previous site and the new www.multipelife.com, we are holding a 'New Site Special' with fantastic discounts up to 40% off. You can get 20% off BDMagic, 30% off ByteCopy, 40% off DVDAid and 20% off Video Converter Ultimate on Windows/Macplatform:

https://www.facebook.com/pavtubefans/app_209569249055691

Read more: http://movie-tips-review.blogspot.com/2014/05/pavtube-new-site-release.html

I'm glad to tell that you can get 20% OFF upgrade discount now. Do not miss it. Hurry up to try the upgrade now.

With the upgraded Video DVD Converter Ultimate, you can not only encode TiVo to MPEG, but also convert tivo to MKV, WMV,MP4 etc files while keeping perfect quality for enjoying your favorite TV shows recorded by TiVo box on Pocket PC, iPod, iPad, iPhone, Android, Windows RT/8, PSP etc device any time and any where or freely edit TV shows on most editing programs, like Adobe Premiere, Sony Vegas, Pinnacle Studio, etc.

Related articles:

Make it easy to watch DVD MPEG-2 videos on HTPC
Convert AAC MKV/MP4 movies to AC3 with 5.1 Channels
Top Tivo Converter – Get Tivo Shows off Tivo onto iPhone 5C

From: http://pc-mac-compatibility-issues.blogspot.com/2013/10/how-to-convert-tivo-to-mpeg.html

How to get Amazon Instant Video working on Samsung Galaxy Tab 3

In the following article you can learn about how to legally get rid of DRM copy protection from Amazon WMV to freely play on Samsung Galaxy Tab 3 anywhere you like.
Global digital media and digital convergence technology leader Samsung Electronics in Seoul, South Korea released the Samsung GALAXY Tab 3 Series Tablet, they will join the previously released Samsung GALAXY Tab 3 Series 7 inch tablet together to provide consumers with richer choices. Samsung GALAXY Tab 3 provides consumers watch, listen, creativity and close friends to share unforgettable moments with family and friends and especially the content of a variety of ways. Whether at home, or on the way to work, the Samsung GALAXY Tab 3 is the perfect choice to capture moments of life.


Now you want to put some Amazon Instant Videos to Galaxy Tab 3? Wait a minute. The Amazon Instant videos, though mainly .wmv format, are not supported by Galaxy Tab 3. The problem is, those WMV videos you downloaded from Amazon are protected (by DRM), and can't be played on any Android tablet except for the Amazon Kindle Fire. To get the Amazon WMV playable on Galaxy Tab 3, you'll have to remove the DRM protection first.

To transfer Amazon WMV movies to Galaxy Tab 3, you need a powerful Amazon WMV video DRM removal or a WMV video Recorder for Galaxy Tab 3. Pavtube ChewTune is exactly the ideal tool that makes it possible to watch Amazon DRM-protected WMV videos on Galaxy Tab 3.

ChewTune for Windows | ChewTune for Mac

Read more: Pavtube ChewTune Review - Free M4V/WMV videos from DRM protection

Read before try

1. Make sure that your computer is authorized for source videos, that is to say you can play the Amazon WMV video using Windows Media Player.

2. During the installation your computer will pop up a Windows Security dialogue box saying “Windows can’t verify the publisher of this drive software”. Ignore it and choose “Install this driver software anyway” to continue installing Pavtube ChewTune.

3. At the end of installing, the setup wizard will install Audio Driver onto your computer automatically through windows command line. This will take a few minutes. Don’t skip or abort, it is essential for running ChewTune correctly.

4. It would take as long as the source movie length for the whole Amazon Instant video to Galaxy Tab 3 conversion process since Pavtube ChewTune records source DRM videos in 1:1 video and audio quality.

Remove DRM protection off Amazon video and convert WMV to Galaxy Tab 3

Step 1: Load Amazon WMV video files to Pavtube ChewTune.

Install and launch the Pavtube WMV to Galaxy Tab 3 Converter, then click the add button to load the WMV video files to the program.


Step 2: Choose H.264 codec format for the Galaxy Tab 3 playing.

Click "Format" and select an output format for the Galaxy Tab 3. Here I choose " Samsung -> “Samsung Galaxy Tab 3 Video(*.mp4)".


Step 3: Optimize the settings for Amazon video to Galaxy Tab 3 conversion.

If you find the default settings may not satisfy your need, can click the "Settings" button to change the settings by yourself.

Step 4: Convert Amazon video to Galaxy Tab 3 video format.

Having finished the settings? OK, just click the convert button and start to convert Amazon video to Samsung Galaxy Tab 3 format with ease.

When the conversion task is finished, you can click "Open" button to get the final output files for your Samsung Galaxy Tab 3 and transfer the converted videos to Samsung Galaxy Tab 3.

If you have music and videos to watch on the tablet, here's a guide for copying local videos to Samsung Galaxy Tab 3.


Tips: MKV, MOV, TS, MPG, Tivo, FLV, F4V and some AVI videos are not accepted formats and you have to convert them to Galaxy Tab 3 optimized H.264 .mp4 videos before downloading them to the device.

Read more:

Play DVD movies on Galaxy Tab 3 10.1
Convert Blu-ray movie for watch on Samsung Galaxy Tab 10.1
Rip Blu-ray ISO to Samsung Galaxy Tab 3 10.1/8.0 for enjoying

From: http://bestvideosolution.blogspot.com/2013/10/watch-amazon-instant-video-on-galaxy-tab-3.html

Tuesday, December 17, 2013

Top 5 Best Blu-ray Ripping Programs 2015-2016 Reviews

Are you looking for Blu-ray Ripping software? Wanna pick up a Blu-ray Ripper and not knowing which one to choose? This article covers the best yet popular Blu-ray rippers on market and compare them side-by-side with reviews as well for your reference. 
Yeah, there are many programs out there that allow you to make copies of your Blu-rays and let you watch them the way you want to view them. Most of you are likely familiar with the excellent Handbrake for ripping standard Def DVDs (HandBrake does not rip or decrypt commercial DVDs), but while the latest version of the software has added SOME support for reading Blu-Ray folder structures, it cannot yet decrypt the Blu-Ray discs the way it can with regular DVDs, so you’ll need to add an intermediate step. (Read Best DVD Rippers for Android/IOS) 

Top Blu-ray Rippers Ranking and Review: 

No. 1 Pavtube BDMagic – Excellent


The good:

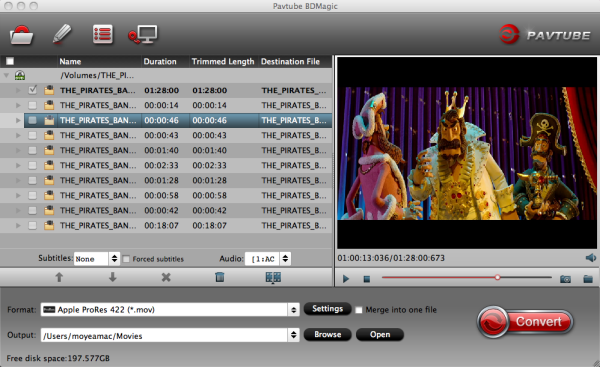
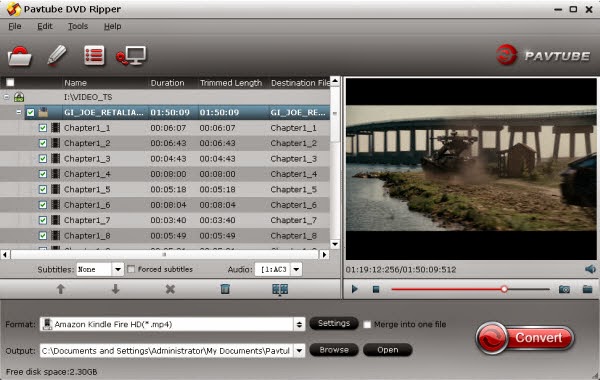
Not any other Blu-ray Ripper can do with all kinds of BD/DVD sources: protected and unprotected Blu-ray Disc, BDMV folder, BD ISO, physical DVD, VIDEO_TS folder, DVD ISO and IFO file. Using the "Full Disc Copy" feature, you can preserve the Blu-ray's original file structure. Insert the Blu-ray disc, click on the "Full Disc Copy" button, and select a folder to copy to. While Pavtube BDMagic also supports conversion to popular device formats, it takes longer. When converting Blu-ray to 1080p HD video, Pavtube Blu-ray Ripper gives pretty much indistinguishable image quality from the original Blu-ray Disc with Dolby Digital 5.1/AAC 5.1 audio as a plus. If you enjoy having everything organized and save memory space while keeping the original quality of your HD movies and videos then THIS IS WHAT YOU WERE LOOKING FOR. It rips 2D/3D Blu-ray into 3D Videos.

The bad: It lets you trim a specific duration from a movie, but not allows you to split movie/divide a movie evenly into multiple segments.

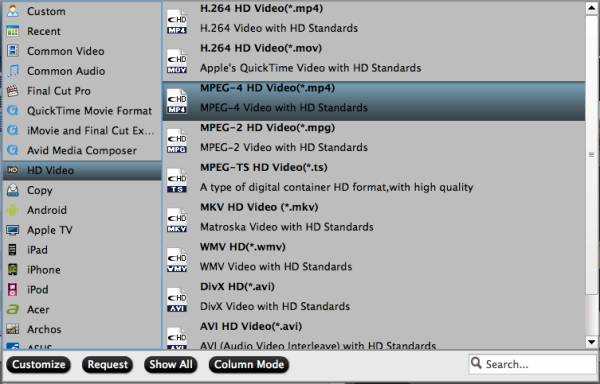
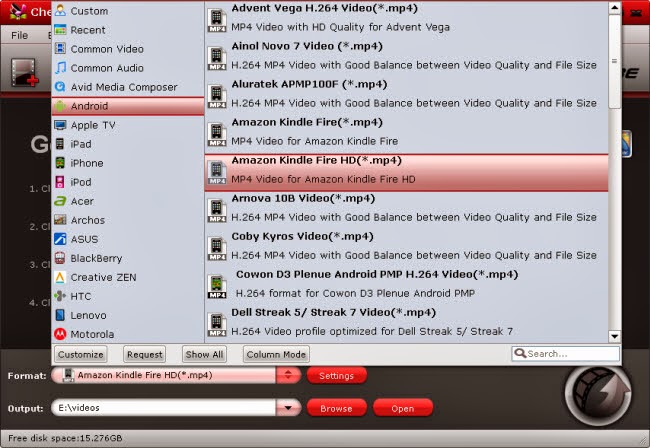
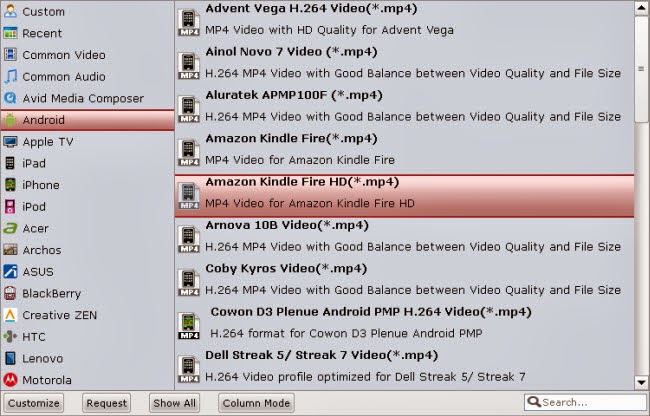
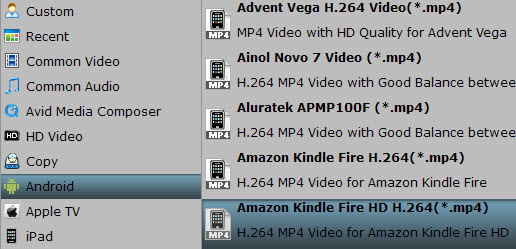
The bottom line: With decent decrypting capability, high quality video output and considerate backup solution and specific format templates for versatile PMP devices (iPad, iPhone, Apple TV, Xbox, PS3, Android tablets and phones, etc), Pavtube Blu-ray Ripper ranks top on the Blu-ray ripping application list.

Editors' note: Pavtube provides excellent customer support service, including lifetime free upgrade of product and technical support. Users can contact the support staff via email for help and suggestion.

Trial Download:

Pavtube BDMagic for Windows (Requires Windows XP/2003/Vista/Windows 7/Windows 8/Windows 8.1)
Pavtube BDMagic for Mac (Requires Mac OS X Leopard (10.5), Snow Leopard (10.6), Lion (10.7), Mountain Lion (10.8), Mavericks (10.9))


More Blu-ray Tips:

Transferring Blu-ray to Google Nexus 4
Put Blu-ray ISO images to Surface RT
Backup Blu-ray DVD movies to iTunes 11 for Apple TV 3No. 2 DVDfab Blu-ray Ripper – Good


The good: 
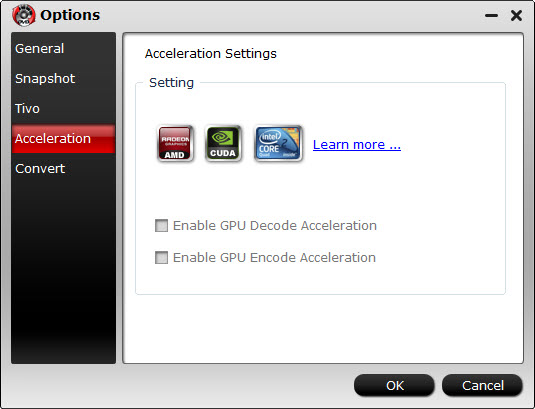
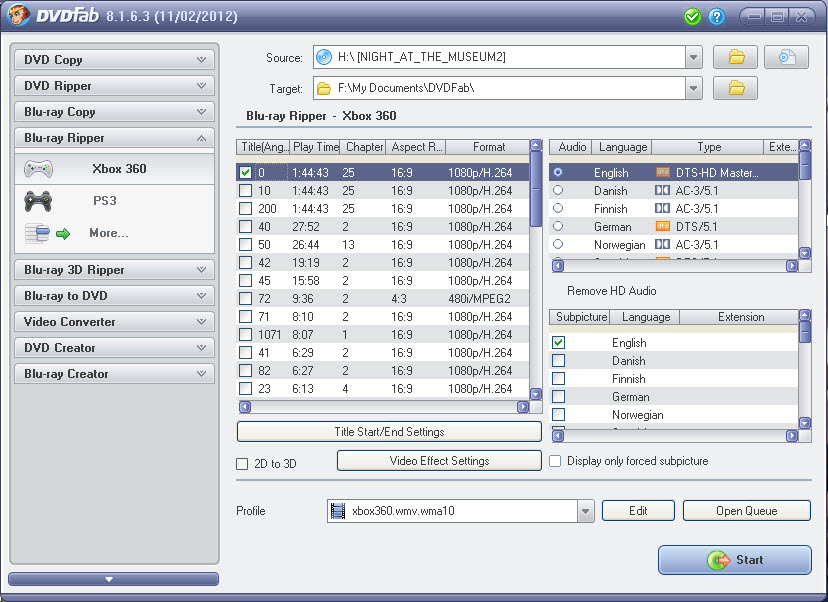
When it comes to decrypting/hacking Blu-ray discs and DVDs, DVDfab is about as good as it gets. DVDfab Blu-ray Ripper well deserves its high reputation in decryption, and it handles not only AACS, BD+, Region code restriction, but also Cinavia protected Blu-rays. By taking advantage of CUDA accelerating, the conversion time is greatly shorted. If you want to rip a Blu-ray to MKV and keep 2 audio language and external subtitles, DVDfab would be your choice.

The bad: It is lacking of DVD ripping feature. It does not support AMD APP encoding. The interface is not very intuitive. And DVDfab Blu-ray Ripper costs more than its alternatives.

The bottom line: DVDfab Blu-ray Ripper decrypts and rips Blu-ray title to various video files playable on next generation consoles like PS3 and Xbox 360, HD player like WD TV Live, or mobile devices like iPod, iPhone, iPad, etc.

Editors' note: DVDfab has a comprehensive forum where you can communicate with other users and get helpful advices. There's not support email but you can submit your problem to DVDfab.No. 3 Leawo Blu-ray Ripper – Good


The good: 
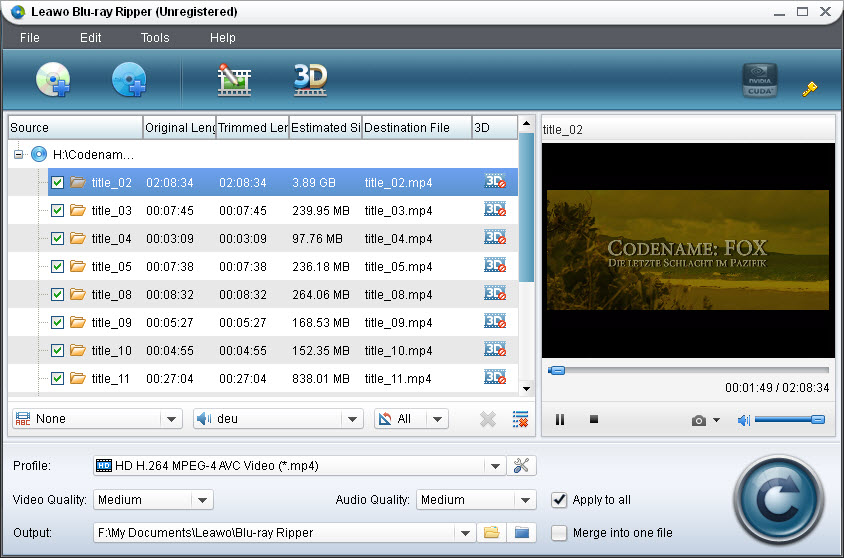
Leawo Blu-ray Ripper comes with the popular feature to convert 2D to 3D for users to enjoy the popular 3D effect and exports various HD and popular common video formats (M2TS, AVI, MP4, WMV, FLV, MPEG, MOV, MKV, RMVB, etc). Leawo Blu-ray Ripper has stunning trim and crop feature- it trims movie more accurate and crops video more considerate than its competitors. It can load multiple Blu-ray and DVD movies at a time. If you have tons of movies waiting to rip and feel like having a Blu-ray Ripper queue them several movies for running overnight, Leawo is recommended.

The bad: Not recognizing Blu-ray ISO or forced subtitle (if there is). GPU encoding is restricted to Nvidia's CUDA only. There's no backup option for keeping original movie quality.

The bottom line: Leawo Blu-ray Ripper is a nice tool for DVD and Blu-ray ripping. There may be some improvements for Leawo to make but it already performs well enough for average users to convert/put Blu-ray and DVD movies to iPad, iPhone, Apple TV, Wii, etc.

Editors' note: We noticed that audio quality is noticeably degraded when ripping Blu-ray with Leawo Blu-ray Ripper.No. 4 Aimersoft Blu-ray Ripper – Fair


The good: By taking advantage of AMD APP, Intel? Quick Sync Video and NVIDIA? CUDA? technology, Aimersoft Blu-ray ripper converts movies faster and saves your time. It rips Blu-ray/DVD into almost all popular video formats (MP4, AVI, MOV, etc) and features versatile format templates for smartphones, game consoles and MP3 players. Its "Backup" function let users envelop a whole Blu-ray movie into a MKV/DVD into VOB without quality loss. If you're looking for a way putting movies onto a HTC, Samsung, LG, Sony, or Motorola smartphone, the Aimersoft Blu-ray Ripper is worth checking out.

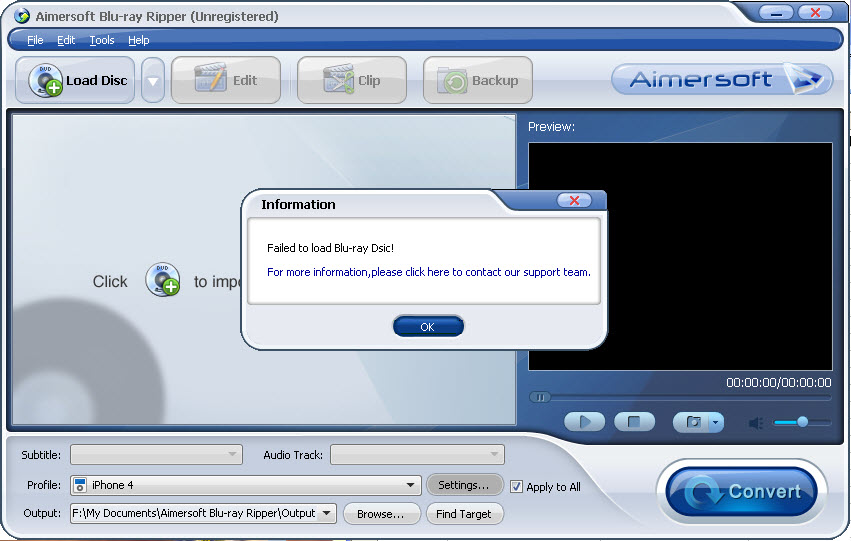
The bad: It does not support Blu-ray ISO or BDMV structure. There's no option for preserving only forced subtitles. Most Blu-ray Discs are not loading to the software.

The bottom line: Aimersoft Blu-ray Ripper handles DVD ripping as good as any other rippers, but the company really needs to work hard and step forward in Blu-ray Disc cracking. Other than that, Aimersoft Blu-ray Ripper is impressively fast and helpful.

Editors' note: It seems that Aimersoft does not handle Blu-ray AACS and BD+ encryption properly and the software keeps popping up a message that we should contact customer support during our testing- the customer support staff offers but apologize though.No. 5 Xilisoft Blu-ray Ripper – Poor


The good: Xilisoft Blu-ray Ripper can convert both standard Blu-ray videos and 3D Blu-ray videos to SD and HD video formats such as MKV, AVI, WMV, TS, etc. And it can preserve 3D effects when your source is 3D Blu-ray movie. NVIDIA CUDA and AMD APP graphic acceleration technology has been introduced to bring faster conversion experience.

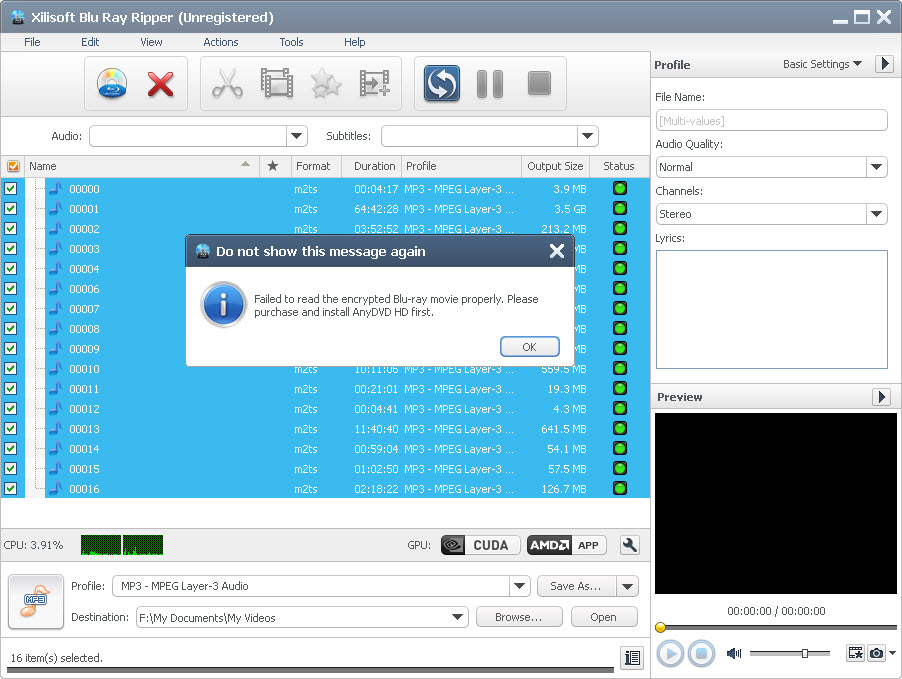
The bad: The app does not decrypt Blu-ray protections and requires AnyDVD HD to be installed in advance for Blu-ray ripping. DVD ripping is not supported.

The bottom line: Xilisoft Blu-ray Ripper does not rip movies from Blu-ray Disc, but if you have had the Blu-ray cracked and saved onto computer hard drive, this tool would be helpful and useful for you to enjoy movies on iPod, iPhone, Apple TV, PSP, Xbox, Zune, NDS, Wii, and 3D smartphones.

Editors' note: This tool is not recommended unless when you want to convert 3D Blu-ray and keep 3D effect.

Updated on 6th, April, 2016

Read more comparison reviews:

Wednesday, December 4, 2013

Convert "Despicable Me 2 Blu-ray” to HD MP4 format

Summery: This article will show you how to convert  "Despicable Me 2 Blu-ray”  movie to HD MP4  format so that you can watch the HD movie thru Home Theater System with family members or friends.

"Despicable Me 2":a great family movie 


Blu-ray disc is protected by DRM (Digital rights management), you need a tool to remove the protection at first, then convert the blu-ray to MP4 HD format with a conversion software. Here I recommend a tool which can complete the conversion process simultaneously.Blu-ray Ripper is the perfect tool to rip and convert Blu-ray movie to MP4 with high ripping speed and excellent HD-quality. You can also Copy the entire blu-ray structure and contents to hard drive lossless. Convert Blu-ray movie to various video formats for some popular smartphones and tablets as well as editing software. 
How to convert "Despicable Me 2 Blu-ray” movie to MP4 HD format?
Requirements:
A "Despicable Me 2 Blu-ray”disc
A PC or Mac
A Blu-Ray Drive. 
Blu-ray Ripper or Blu-ray Ripper for Mac (Free download and instal it )
Step 1.Load Despicable Me 2 Blu-ray files 
Inserted Blu-ray disc to your Blu-ray drive. Then click the "Load file" button to import the Blu-ray files


Step2 Choose output format.
Click "Format" menu to get the output video format list. Choose "HD Video>H.264 HD video(* .mp4)".
You can adjust the parameters like video codec, video bitrate, frame rate by click “Settings” button as you wish.

Tips: If you want to backup your blu-ray movies with keeping multiple audio tracks and subtitle streams, just try to use Pavtube ByteCopy for Windows or Mac.

Step 3.Convert "Despicable Me 2 Blu-ray” to HD mp4.
Click "Convert" button to start convert "Despicable Me 2 Blu-ray” to HD mp4.  After the conversion finishes, click “open” button to get the MP4 videos in the output folder. Then watch the Despicable Me 2 Blu-ray movie on your Home Theater System via hard drive or connection line. Enjoy the movie life!

Related Articles: 
Rip “Delivery Man” Blu-ray Movie to Nexus 5 for watching
Rip “The Croods Blu-ray” to Kindle fire HD 
  dd Subtitles to MP4 Video

Rip Blu-Ray to ProRes for FCP Editing on Mac

This guide is aim to show you how to rip blu-ray movie to Apple prores for Final Cut Pro editing on Mac.

“I am busy preparing for the filmfestival recently, and I encounter a problem about ripping a short blu-ray movie to prores for FCP editing, the movie is used to playing at the beginning of the filmfestival, who can giving me some suggestion?”.


For ripping blu-ray movie to prores,you need a Blu-ray ripping tool Pavtube Blu-ray to ProRes Converter for Mac is the best choice. With it, you can rip/convert Blu-ray movies to Apple ProRes  for FCP without quality loss in a fast speed on your Mac. Follow the guide below to get Blu-ray movies transferred to Final Cut Pro smoothly.

Requirement:
1. Get a Mac 
2. Connect Blu-ray Driver to your Mac

Step 1. Load Blu-ray movie

Install and run the Blu-ray to ProRes Converter for Mac, click "Add Disc" icon to add source Blu-ray/DVD Disc from disc driver. Or load from BD/DVD folder or IFO/ISO file.


Step 2. Choose output format.


Click the Format button, and choose "Final Cut Pro > Apple ProRes 422 (*.mov)" as best codec for FCP 


Tip: If you like, click on the “Settings” icon to adjust audio and video parameters, such as Bitrate, Size, frame rate, etc to your own requirements.


Step 3. Convert Blu-ray to prores for FCP editing.
Click the “Convert “button to start conver blu-ray to Prores Converter for FCP under Mac. Clicking "Open" icon, you can find the converted prores files then transfer the prores files to Final Cut Pro for editing freely.

And if you prefer to work with multiple audio tracks, another Pavtube ByteCopy for Mac software can do this for you, it supports to preserve multiple audio and subtitle streams and leave out unwanted ones, retain chapter information, allow editing videos, etc

Read More