Monday, January 26, 2015

Nexus 10 BD Ripper-Put/Add and Play Blu-ray on Google Nexus 10

This article will provide you an easy, quick and reliable workflow for ripping Blu-ray movies to Nexus 10 supported video with perfect audio and video synchronization. 

Here is some Blu-ray playback issue on Nexus 10:

Q1:
"I have created several ISO image files from my Blu-ray collections. Recently I bought a Google Nexus 10. I would like to copy these Blu-ray ISO files to my Nexus 10 so that I can watch them easily. But it seems Nexus 10 would not work with a Blu-ray ISO file; how can I do this?"

Q2: "Elysium", writer/director Neill Blomkamp's second feature-length title, takes a more literal approach to some of the humanistic themes explored in his 2009 feature debut "District 9". I like this Blu-ray movies very much, but the the problems is we are heading for Europe on vacation tomorrow, and we'd rather not to take discs, Blu-ray drive and my Macbook Pro – all of these on board. So can I take this Blu-ray movie on my Nexus 10? Then I can freely play "Elysium" on the 10-inch display with 2560×1600 resolution.
Blu-ray playback issue on Nexus 10

To enjoy Blu-ray (ISO) movies on your Google Nexus 10, you need to use a third party Blu-ray to Google Nexus 10 Converter to rip Blu-ray to a format that is well compatible with your Nexus 10 device.

Pavtube BDMagic is highly recommended to do this job. (Read Top 5 Best Blu-ray Ripper ReviewIt features optimized format preset for Google Nexus, and takes simple steps to finish Blu-ray to Nexus 10 video ripping. You load a Blu-ray disc into the program, choose a format as target for Nexus 10, and click “Convert” to start, Pavtube software will take care of the rest. Mac version is here. Download a free trial version here and follow the steps below:

Convert and watch Blu-ray movies on Google Nexus 10?

Step 1. Load Blu-rays to this Blu-ray to Nexus 10 Ripper.

Firstly you need to get a Blu-ray drive to make your PC/Mac recognize your Blu-ray discs; the built-in drive is only able to play DVDs. After that, let's launch Blu-ray Ripper, click the top left icon to import disc.

It will detect and show all the Blu-rays that connected, click the disc name to import them directly. And no worries if you only have Blu-ray ISO files, Pavtube will recognize the ISO files directly so that you don't need to run virtual drive to extract videos from ISO image file firstly.

Blu-ray to Nexus 10 Ripper


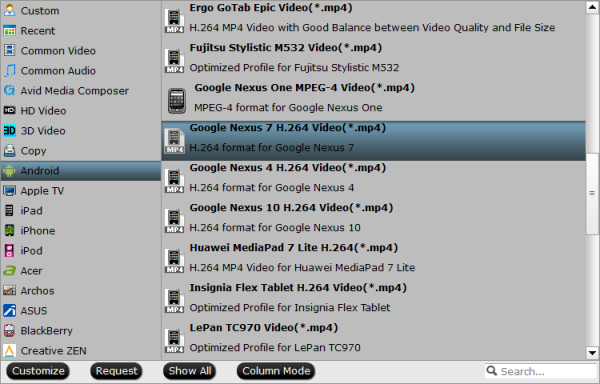
Step 2. Choose video format.

For Google Nexus 10, the most compatible video format is MP4. Now click the drop-down list besides "Format", choose "Android > Google Nexus 10 H.264 Video(*.mp4)" for Google Nexus 10. Another way to quick locate these presets is to submit "Nexus" in the search box.

Nexus 10 video format

Step 3. Edit video before conversion. (Optional)

Click the pencil-like icon on the top to edit videos before conversion. You can trim, crop, edit audio, add subtitles here.

After editing video, let's back to the main interface. Have you noticed the red "Settings" besides Format drop list? Click it, you can customize video size, bitrate, frame rate, sample rate(Hz) at your needs.

Nexus 10 video settings

Step 4. Start conversion.

Click the big red "Convert" to start converting Blu-ray to MP4 for playback on Nexus 10. Wait for moments, and quick locate the converted video by clicking "Open Output folder" for video transferring.

Tips: Please keep the Internet connected during importing and converting, so that the whole process would be successfully managed.

Related Source


Friday, January 23, 2015

Copy Blu-ray to hard disc/iPad in single or multi-track MP4

This article shows you how to convert and copy Blu-ray to mp4 format with remaining single track or multiple audio tracks for storage on hard disc or playback on iPad without limitations.

Is there a Tool that can rip a Blu-ray into one MP4 file files with only a single track or multiple audio tracks since I like to play it from a hard disc (my media center at home) and also from the iPad when being not at home? Anyway, mp4 and multi-track mp4 are my preferred video formats. One it to be done in a few steps and not using different programs. Any insights?

Copy Blu-ray to hard disc/iPad in single or multi-track MP4

Not all videos output from a multi-track Blu-ray can keep intact audio tracks in different languages. To have complete movie content yet unimpaired audio tracks after copying Blu-ray to mp4 for backing up on hard disc and watching on iPad with any language by switching to the desired one, just give a shot on Pavtube ByteCopy- best Blu-ray to MP4/Multi-track MP4 Converter. (Read ByteCopy review)

Overall,the program is easy to use for editing and conversion and makes great quality copies of my Blu-rays and DVDs. It can help you backup files from Blu-ray discs and standard DVDs to MP4 container format with preserving multiple audio tracks. It also enables you to convert Blu-ray/DVD disc contents to compatible mp4 format for most media players and mobile devices with ease by removing Blu-ray/DVD copy protections. Follow the step-by-step guide below.

Copy Blu-ray movie to (Multi-track) MP4 for backup on hard disc/iPad

Step 1. Free download Pavtube ByteCopy (Mac users get it here), install and launch it. Click the top left icon, load source file into this program from Blu-ray drive, Blu-ray folder or Blu-ray ISO. Ensure the Blu-ray Disc was in the drive before loading. It will check the main title by default; moreover, ISO files could also be recognized automatically so that you no longer need to run virtual drive to mount it.

Blu-ray to MP4/Multi-track MP4 Converter

Step 2. Click the "Format" option, here are two choices for you;

A. To output a single track, choose MPEG-4, H.264 MP4 from Common Video profile list. If you want to keep 1080p resolution as source movie, you can choose HD Video > H.264 HD Video(*.mp4) for backing up on hard disc later using.

If you wanna play the output videos on certain devices, a better choice is selecting the preset for device like iPad as the output format in the output box. What's more, this Blu-ray to MP4 Converter also allows you to customize video and audio parameters via clicking Settings button. The adjustable settings include codec, bit rate, frame rate, sample rate, audio channel.

B. To output multiple audio tracks, choose “Multi-track Video > Multi-track MP4 (*.mp4)”

Multi-track MP4 format

This profile extracts more than one audio track from source Blu-ray movies in saved MP4 files. And you are allowed to remove unwanted audio track by unchecking the “Check” box in front of each audio source.

Step 3. Hit the “Convert” button on Pavtube ByteCopy main UI to start ripping Blu-ray to single or multi-track MP4. Once the conversion process finishes, open output folder and locate the created (multi-track) MP4 movie for storage on hard disc or playback on iPad with a multi-track player.

Apart from multi-track mp4, you can also rip Blu-ray as well as DVD to multi-track mov, multi-track mkv and multi-track AVI for viewing. 
  • Add Subtitles to MP4 Video
  • Wednesday, January 21, 2015

    Fastest Rip and Copy DVD ISO/IFO files to Google Nexus 10

    Wanna get ISO/IFO from DVD to Nexus 10 for enjoyment on the move? Follow this awesome user guide to convert ISO/IFO to Google Nexus 10 compatible video format for playback.
     
    In order to keep DVD discs from scratching, or manage your movies in a more convenient way, most of you are fond of backing up them into ISO image files. Then what if to play DVD ISO/IFO files on your Nexus 10? (Also learn how to convert video to play on Nexus 10)

    Copy DVD ISO/IFO files to Google Nexus 10

    To our disspointment, ISO format is not supported by Google Nexus 10. In order to successfully play ISO on Nexus 10, you will need to convert ISO to Nexus 10 supported video formats like MP4 first and then transfer the converter videos to your Nexus 10 for playback.

    Here, Pavtube DVD Ripping Program is an ideal tool to rip DVD ISO image files as well as DVD discs to Google Nexus 10 highly compatible video files. (Read best DVD Ripper Review) All you have to do is to load the ISO files, choose the output format as "Google Nexus 10" and wait to get the videos with optimized settings for playback on Nexus 10.

    Besides, this DVD ripper can also convert DVD ISO/IFO to all regular video formats like MP4, MOV, MKV, FLV, AVI, WMV, MPG, ASF, etc. with smart video editing features. The equivalent Mac version is DVDAid for Mac. Just download the right version and follow the below guide.

    How to convert DVD ISO image files to Google Nexus 10 compatible videos files

    Step 1: Launch the best Nexus 10 ISO/IFO Ripper. Click on "IFO/ISO" icon to load your ISO image file into this program.

    Nexus 10 ISO/IFO Ripper

    Step 2: Click "Format" bar, you can easily find the optimized videos for the Nexus 10 under "Android > Google Nexus 10 H.264 Video(*.mp4)". The preset is specially designed for Neuxs 10 and fit on the Nexus 10 perfectly.

    Nexus 10 video format

    TipIf you like, you can also click the "Settings" button to change the video resolution, encoder, frame rate, etc. For watching videos on Nexus 10, 720p with 2000~2500kbps is just all right. I found bitrate higher results in big file size, and lower visible quality loss, and vice versa.

    Nexus 10 video settings

    Step 3: When everything is OK, just press the "Convert" button to start the conversion for ISO/IFO to Nexus 10 MP4 videos. It will not take much time. Just wait for the conversion process to get done.

    Bingo! After the conversion, just transfer the converted video files to your your Nexus 10 via USB cable. In this way, you can watch ISO/IFO image files on Google Nexus 10 and enjoy the DVD movies!

    Additional Tips:

    If you have any problem when enjoying videos on Google Nexus 10/7/4, just check out Google Nexus Column to learn more.

    Friday, January 16, 2015

    How to Put & Play MPG/MPEG files on Google Nexus 7

    How to Play MPG and MPEG on Nexus 7 is one of the most sought informations by newbies. Below, I will address this question to do MPG/MPEG to Nexus 7 conversion flawlessly.

    Gotta Known things About MPEG

    MPEG stands for Moving Picture Experts Group. This group specializes in the development of video and audio encoding standards. When you have come into possession of a file with an .MPG or .MPEG extension, you usually have either MPEG-1 or MPEG-2 video. MPEG-1 video is used on VideoCD (VCD) discs and MPEG-2 video is used on Super VideoCD (SVCD) and DVD discs (including home-made DVDs,commercial DVDs, Netflix DVDs).

    Play MPG/MPEG files on Google Nexus 7

    Why MPG and MPEG files won’t play on Google Nexus 7

    The reason you cannot view MPG or MPEG videos on Google Nexus 7 is simple: the default and downloaded player on the Android 4.1 Tablet cannot find a suitable decoder for the file. Assuming that you want enjoy MPG or MPEG files on your Nexus 7 tablet, you’ll need to get some help from 3rd-party software to convert MPG/MPEG files to H.264 or MPEG-4 encoded MP4 videos for Nexus 7.

    To achieve your goal smoothly, here I will take Pavtube Video Converter Ultimate (Alternative Mac Version) for an example to show you how to shows you how to converting MPG/MPEG to Nexus 7 supported video formats. The program is easy to use and produces excellent results for the Google Tablet. Conversion speed seems fine and the converted videos look decent on Nexus 7 as original. (Here is review) Just download it and follow the steps below to realize the way getting MPG & MPEG files to play on Google Nexus 7 smoothly.

    Converting MPG/MPEG files for Google Nexus 7

    1. After downloading, install and run the Nexus 7 Video Converter on your PC, then click “Add Video” button to load your MPG/MPEG files. You can also add videos formatted in MKV, FLV, AVI, MTS, WMV, TiVo, MXF, VRO, VOB and more. The software supports batch conversion so you can convert several files in one go.

    Nexus 7 Video Converter

    2. Select output format. Click “Format” bar, you can easily find optimized prifiles for Nexus 7 under “Android > Google Nexus 7 H.264 Video (*.mp4)”. This preset is specially designed for Nexus 7.

    new Nexus 7 video format

    3. Start the conversion process.

    Tip – Set Qaulity: Back to step 2, you can click “settings” button to adjust the output parameters of the video. Remember the file size is based more on bitrate than resolution which means bitrate higher results in big file size, and lower visible quality loss.

    Once the process completes, download and transfer the result MP4 videos to your Nexus 7. In this way, you can enjoy MPG and MPEG files on Google’s Nexus 7 Tablet as you like. Blu-ray, DVDiTunes/Digital Copy can also be played on Nexus 7.

    Wednesday, January 14, 2015

    How to Stream DVD sitcom to Roku 3 over Plex channel

    Want to stream DVD to Roku 3 using Plex? What would be the best way to go about it? Well, this article will just outline the details to watch DVD on Roku 3 via Plex channel.

    Roku can allows users both to stream video content from the Internet and play movies locally through a USB drive, but the problem is that the supported media file formats are limited. It can't handle DVD discs.

    stream DVD to Roku 3 using Plex

    So if we want to enable Roku 3 to play your own DVD collections like interesting sitcom via Plex channel, we will need to rip and convert DVD to Roku 3 supported video formats first.

    Among various DVD ripping tools, Pavtube DVDAid seems to be the best one. It is easy to use and helps you fast convert DVD and ISO/IFO to Roku 3/Plex playable (H.264) MP4, MKV format with fast encoding speed and high quality. (Read the review)

    In addition, the program has outputs with optimized settings for your portable device like iPad Air, iPhone 6, Samsung Galaxy Tab 3, Galaxy Note 4, etc. You just need to select the device as the output format and you can rip DVD to fit your device without further settings. Download the tool and learn a simple guide on ripping DVD for watching on Roku 3 via Plex channel.

    How to Rip DVD sitcom to Roku 3 for Playing via Plex

    Step 1: Load DVD movies

    Install and launch DVD to Roku 3 Converter(Mac version is here), click the "Load DVD" button on the menu bar to load your DVD files. By importing DVD files, you can select DVD subtitle, audio and angle, preview DVD videos, snap screenshots, etc.

    DVD to Roku 3 Converter

    Step 2: Select an output format

    To convert DVD to MP4, MKV for Roku 3/Plex, just click on the dropdown menu of "Format", and then choose MKV, H.264 MP4 from Common Video profile list. Also you can rip your DVD to PS4 for playback.

    Roku 3/Plex video format

    Tip: If you like, you can click "Settings" to change the video encoder, resolution, frame rate, etc. as you wish. Keep in mind the file size and video quality is based more on bitrate than resolution which means bitrate higher results in big file size, and lower visible quality loss, and vice versa.

    Step 3. Rip DVD sitcom to Roku 3

    Click the convert button under the preview window, and the DVD ripper will start the conversion from DVD movies to MKV/MP4 for Roku 3.

    After the conversion, you can hit "Open" to quick locate the converted video. Then, set up Plex and Plex channel will recognize, catalog, play and stream these DVD sitcom to Roku 3 at ease.

     Also have Blu-ray? Learn how to copy Blu-ray/DVD to Plex Media Server and Xbox 360. 

    Monday, January 12, 2015

    Backup Blu-ray movies to Boxee Box with multi-track MKV

    This article tells how to convert Blu-ray to multi-track MKV, so we can watch them on Boxee Box smoothly with several languages (audio tracks).

    Boxee Box can reach any of the media files stored on your computer like video, song or pictures, it can make it easier to sort through than ever. However, Boxee Box seems to only works without issue with avi, mkv video format and you are probably to have the question: Is it possible to backup and play Blu-ray on Boxee Box with multiple languages? 

    Backup Blu-ray movies to Boxee Box

    Due to Blu-ray protections and limitations, you can't directly transfer Blu-ray to Boxee Box, let alone to play your Blu-ray with multiple audio tracks to get different languages. Luckily, here is a Blu-ray to multi-track ripper- Pavtube ByteCopy to help you realize.


    It works as the pro version of normal Blu-ray ripping tools, which is capable of rolling off Blu-ray protection and transcode your movie to multi-track MKV format with best quality for Boxee Box playback. Mac version is available here. (Read ByteCopy Review)

    How to copy Blu-ray to MKV with multi-track for playback on Boxee Box?

    Step 1. Launch ByteCopy and load disc

    Click the "Load file(s)" icon to import Blu-ray disc (need an external Blu-ray drive), Blu-ray ISO image files and Blu-ray folder.

    Blu-ray to Boxee Box Ripper

    Step 2. Choose Multi-track MKV

    Click the "Format" drop-down list and choose "Multi-track Video > Lossless/encoded Multi-track MKV(*.mkv)" for Boxee Box.

    In addition to lossless mkv, multi-track AVI, MP4 and MOV is also supported for outputting.

    Boxee Box video format

    Step 3. Adjust settings (Optional)

    Click "Format" to adjust video settings like video size, bitrate, frame rate, etc.

    Switch to "Audio" tab, you can free choose wanted audio tracks and set the audio channel.

    Multi-track settings

    Step 4. Start conversion.

    Back to main interface and click the big "Convert" to start converting Blu-ray to multi-track MKV for playback on Boxee Box. After conversion, click "Open output folder" to quick locate the converted video. And you are able to put converted video Boxee Box and freely select any audio track when you watching the movies.

    Wednesday, January 7, 2015

    How to add .mkv videos to iTunes on Mac?

    The intuitive guide shows you how to convert MKV video files to iTunes supported video formats on Mac for adding to iTunes and playback on iDevices.

    A number of HD videos downloaded from the internet are wrapped up in MKV container and you can play them on Mac using a media player like VLC, Mplayer, or Quicktime with plug-in. However, if you attempt to import your MKV files to iTunes, and possibly sync them to your iDevices later, you are not going to get what you want.
    import your MKV files to iTunes

    Question: How to add .mkv videos to iTunes?

    Hi everybody, I want to add my movies to iTunes movie library but it doesn't let me to add .mkv files. Anyone can help? Thanks in advance..

    MacBook Pro (Retina, 13-inch, Late 2013), OS X Mavericks (10.9.3)

    Actually, we have to admit Apple doesn't do that because MKV is not compatible with iTunes. iTunes supports video formats such as MOV, MP4 and M4V. In order to put MKV to iTunes for playback on iPad iPod iPhone with Mac OS X, we need a Mac MKV to iTunes Converter to help us do this task.

    Here, Pavtube iMedia Converter for Mac, actually an easy-to-use but powerful video to iTunes converter for Mac. It not only can convert MKV to iTunes-friendly format without any loss of quality, but also can transcode Blu-ray, DVD, VIDEO_TS folder and any other video formats including VOB, MKV, TiVo shows, WMV, MPG, FLV, F4V, etc. for adding to iTunes and syncing to iDevices. Apart from that, people who want to make changes to the video can easily touch up the video with its built-in editor. Below is a step-by-step tutorial.

    Convert and Add MKV to iTunes on Mac OS X (including Lion, Mountain Lion, Mavericks and Yosemite) 


    Step 1 - Add MKV files

    Simply drag-and-drop your MKV to the Mac MKV to iTunes Converter or click "Add Video" button to load  MKV video. You can add mulptile files at a time an convert them in batch.

    If you are windows user, turn to Pavtube Video Converter Ultimate.

    Mac MKV to iTunes Converter

    Step 2 - Select iTunes supported format

    Since iTunes supports MP4, M4V and MOV formats, you can click Format bar and choose any of the three from Common Video as the output file format.

    iTunes supported format

    If you eventually want to play the video on your iPhone, iPod, iPod and the likes, you can select your device model from an array of presets and the program will set the optimum resolution, bit rates, codecs, and other parameters without your say-so.

    Tips: This MKV to iTunes converter Mac allows for customizing subtitle. If you wanna keep your original subtitle or add new, you can click on “Edit” button, the video editor will pop up. Tap “Subtitle” option and check the “Enable” icon. Then, by clicking on “Browse” to import *.srt, *.ass, *.ssa subtitle file you’ve downloaded. 

    Step 3 - Start conversion:

    Simply click the "Convert" button to start converting and everything else will be automated. If you have added quite a bunch of video files, it would take some time to convert. In such case, you can click Option and tick the box “Shut down the computer after conversion”.

    You're done. If you've selected MOV as the output format, after the video conversion, you should add converted MOV files to iTunes. Launch iTunes, drag and drop MKV files to iTunes or enjoy them on Apple devices, such as iPod, iPhone or iPad.

    Monday, January 5, 2015

    Ripping DVD to Android Tablet for playback with MX Player

    This article shows you how to convert DVD movies to MP4 for Android Tablet with the best DVD to Android Converter for playback with MX Player.

    As is known to all that Android now is exceedingly hot among people all over the world. As a strong rival against Apple, Android has clear advantages. This article will talk about how to rip DVD video on to Android Tablet for playback with MX Player in view of most Android users' demands.
     Ripping DVD to Android Tablet for playback with MX Player

    If you want to get your movies off of DVD discs and onto the Android Tablet for playback, you may have to do some work in advance. In other word, you’ll need to rip and convert DVD to Android Tablet compatible video formats first like MP4 or Android video Player supported MKV and then transfer the converted video files on your Android Tablet for playback.

    Pavtube DVDAid is recommended to do the DVD to Android Tablet conversion. It is an easy-to-use and wonderful DVD ripping tool to help you convert both commercial DVD movies to MKV/MP4 format for unlimited playback on Android Tablet via MX player. (Here is its review)

    Besides, it can also rip DVD to all other popular video formats like AVI, MOV, MKV, WMV, FLV, MPG, etc. for playing and sharing on iPhone, iPad, Galaxy Tab, Blackberry, YouTube, Facebook, etc. Moreover, it allows you to edit your DVD movies by trimming, cropping, adding watermarks, etc. The equivalent Mac version is DVDAid for Mac. Just get it now and follow the guide below.

    Copy your DVD movies to Android Tablet for smoothly playback with MX Player

    1. Import DVD movies

    Launch the best DVD ripping software after successful installation. Insert a DVD disc that contains the movie you want to rip. Click the DVD disc button to load your movies. This DVD ripper can also rip ISO/IFO files or DVD folder to play on Android Tablet with ease.

    DVD to Android Converter

    2. Select MP4 as the output format

    Click on “Format" bar, select an Android friendly format, e.g. H.264 .mp4 for conversion. There are optimized format for Galaxy Tab, Xoom, Acer Iconia Tab, Asus Transformer etc, Google Nexus 7, Kindle Fire. Basically the 'Common Video >> H.264 Video (*.mp4)' is an universal format for Android tablets and smartphones. Or depends on your device, you can choose a suitable video format from "Android" catalogue.

    Android video format

    (Optional settings: If you want to change the output format parameters, simply click the Settings button. In the pop-up window, you can customzied the video size, frame rate, bit rate, sample rate and more.)

    3. Start converting

    Finally, click "Start" to rip DVD to MP4 for Android tablet immediately with the CUDA acceleration technology. You can find the process in the “Conversion” interface. Once the conversion is done, you can get the output files via clicking on “Open” button effortlessly and just transfer them to your Android tablet for watching on the go.

    For playing video on Android, MX Player is by far the most versatile and well known video player out there which can help you play converted MKV files as well as MP4 video files perfectly.

    You can also try other Android video players like Rockplayer, MoboPlayer or DicePlayer as optimal one for movie entertainment at ease. Also you can get Blu-ray ISO and Blu-ray to Android for playback.

    Sunday, January 4, 2015

    Amazon WMV DRM Removal: Play Amazon Instant Video on Nexus 5

    If you have problems about playing Amazon Instant Video on your Nexus 5, you can check out the tutorial to remove DRM from Amazon WMV to Nexus 5. 

    I have downloaded a couple of files from Amazon.com that I’d really like to put on a flash drive to give to a friend, who wants to put it on her Nexus 5 smartphone. How to make it?
    Play Amazon Instant Video on Nexus 5

    As is known to everybody, the WMV videos purchased from Amazon store, including music, videos, movies, and TV show etc. are usually format type unsupported by the Google Nexus 5. The problem is, those WMV videos you downloaded from Amazon are protected (by DRM), and can't be played on any Android/Windows tablet except for the Amazon Kindle Fire (HD). So if you would like to transfer Amazon WMV videos to Nexus 5 for playback, you have to remove DRM from Amazon Instant Video and convert/record it to Nexus 5 compatible formats.

    To do it, Pavtube ChewTune - a Amazon WMV to Nexus 5 recorder can do great help! Actually, it is nearly able to unlock all the DRM videos as long as your video is authorized and it's able to playback on this computer. (Here is its review) And the Mac version is ChewTune for Mac

    * Legally strip DRM copy protection from iTunes, Digital Copy, Amazon, BBC iPlayer
    * Record DRM media to iOS/Android/Windows devices supported file type with subs
    * Change DRM files to any regular format you want with expected quality
    * Support files downloaded from iTunes, Amazon Video on Demand, Blockbuster, etc.
    * Support batch conversion and auto-shutdown computer after conversion

    Read before try

    1. Make sure that your computer is authorized for source videos, that is to say you can play the Amazon WMV video using Windows Media Player.

    2. During the installation your computer will pop up a Windows Security dialogue box saying "Windows can't verify the publisher of this drive software". Ignore it and choose "Install this driver software anyway" to continue installing Pavtube ChewTune.

    3. At the end of installing, the setup wizard will install Audio Driver onto your computer automatically through windows command line. This will take a few minutes. Don't skip or abort, it is essential for running ChewTune correctly.

    4. It would take as long as the source movie length for the whole Amazon Instant video to Nexus 5 conversion process since Pavtube ChewTune records source DRM videos in 1:1 video and audio quality.

    How to transfer Amazon DRM video to Google Nexus 5

    Step 1. Download Pavtube ChewTune as the Best DRM removal software.

    There would be a command window pop up during the installation to install specific soundcard drive for DRM Removal, pls do not shut down it and let it running until the installation completed.

    Step 2. Add video and choose target format.

    Drag and drop your videos to this WMV DRM Removal Tool directly, or you can click icon to import them as below.

    WMV DRM Removal Tool

    Let's click the drop-down-list besides "Format" and choose "Android ->Google Nexus 7 H.264 Video(*.mp4)" as the best video format for Google Nexus 5.

    best video format for Google Nexus 5

    Step 3. Customize target video specs. (Optional)

    Click "Settings" to enter Profile Settings window, you can find settings for video size, codec, bitrate and frame rate. Change them according to your own needs.

    best video settings for Google Nexus 5

    Step 4. Start conversion.

    Now click the big red icon to start converting DRM videos to Nexus 5 in batch; this converter will activate your media player automatically and start to play this video (let's keep it running). The player windows cannot be removed or closed.

    In the meanwhile, it will start to record this video in MP4 real-time. The conversion time is equal to the video length itself; you can do other tasks during the converting the process.

    Note: The system volume could be turn off temporally during this period; but no worries and do not touch it to get perfect DRM removed video.

    After the conversion, click "Open output folder" to quick locate the converted video and transfer to your Nexus 5 for playback.

    Tips:

    1. The DRM removing process may mislead your anti-virus software to falsely report virus/worm. Please ignore the report to keep on ripping.

    2. This product cannot convert unplayable video (damaged, unauthorized, etc).

    Also get a software bundle to convert DRM video as well as common video to play on Nexus 5.

    Monday, December 29, 2014

    Rip a Blu-ray movie to HEVC/H.265 MP4 on Windows

    This guide shows you how to rip and convert a Blu-ray movies to HEVC/H.265 MP4 for freely preservation or playback on Windows.

    If you want to view a Blu-ray movie on your video player devices, you need to convert the movie to a specific video at first. Here you can use H.265 codec to get a video with high video quality and relatively smaller size. Can't find a way out? This article will be a great help which is going to talk about how to convert Blu-ray to HEVC/H.265 MP4 format for freely preservation or playback on Windows.
    Rip a Blu-ray movie to HEVC/H.265 MP4

    To fulfill the task, Pavtube BDMagic/ByteCopy/Video Covnerter Ultimate is highly recommended because each one could unfold Blu-ray and DVD disc's wrap, get the content inside and turn them into H.265 MP4 video. All of them areprofessional and powerful all-in-one Blu-ray/DVD disc handling tool, integrating DVD/Blu-ray Ripping, Conversion, and Backup.

    With decent decrypting capability, high quality video output, considerate backup solution and specific format templates for versatile PMP devices (iPad, iPhone, Apple TV, Android, Windows tablets and phones, etc these Blu-ray to H.265 Converters rank top on the Blu-ray ripping application list. Just get it now and follow the steps below to convert Blu-ray discs to HEVC/H.265 MP4 on Windows.

    How to Convert Blu-ray to HEVC/H.265 MP4 on Windows

    Note: A blu-ray disc drive is indispensible. The common DVD-ROM is not able to read Blu-ray disc.

    Step 1. Load source Blu-ray disc to the software

    Launch this Blu-ray to H.265 Ripper and click "File" button to import Blu-ray movies into the program. DVD/BD discs and folders are also supported.

    Blu-ray to H.265 Ripper

    Step 2. Choose output profile

    Navigate the Format and click Common Video and choose H.265 Video(*.mp4).

    HEVC/H.265 MP4 format

    P.S. What's more, the Blu-ray Ripper has optimized the videos settings for devices beforehand, so you do not have to adjust the video resolution, bit rate and so on.

    Step 3. Start Blu-ray movie to HEVC/H.265 MP4 conversion

    Tap "Convert" button on the main interface to start transcoding Blu-ray movies to HEVC/H.265 MP4.

    After the conversion, click "Open" button on the main interface to locate the result videos and then you can play the Blu-ray movies on your PC, H.265-compliant media players and mobile devices smoothly. In addition, you can also rip your Blu-ray to QuickTime mov, WMV and H.264 MP4.
    NEWS!!! Recently, Pavtube Studio has upgraded its top-ranked Pavtube BDMagic/ByteCopy/Ultimate to version 4.9.0.0 with supporting the most advanced hardware acceleration NVIDIA CUDA & AMD APP by H.264/H.265 codec, which can give users 30x video transcoding speed than before.

    Read More:

    Friday, December 26, 2014

    Upgrade! Pavtube Supports H.265/HEVC, XAVC and Latest Blu-ray!


    Pavtube has released the latest products of Windows Platforms, Support H.265/HEVC Encode & Decode, XAVC codec! Detailed information is in this article.

    Marry Christmas 2014! On December 25, Pavtube Studio has announced this new update version. All Win versions have been updated to 4.8.2, which add XAVC, H.265/HEVC decode and encode, latest Blu-ray discs ripping features and work more powerful. What new features have they got?
    1. Support MXF in XAVC video codec
    2. Add H.264 baseline/main/high output profiles
    3. Support H.265/HEVC decode
    4. Support H.265/HEVC encode
    5. Support latest Blu-ray movies, like The Expendables 3, Le Chef, Sin City A Dame to Kill For, Sands of Iwo Jima, When The Game Stands Tall, Love in Venice, Mystery Road, Pink Floyd Endless rive,etc. are all supported.
    Pavtube Upgrade 

    Updated software


    XAVC support: 


    For the first outstanding feature, many powerful camcorders can shoot under this XAVC mode, like Sony, Panasonic, JVC and Canon all have many series HD Camcorder which can such job. Most XAVC codec will shot in MXF format, this may be good for importing quality ,but may be a big problem for their users. Although Sony has offered their XAVC plug-in to help customer to solve this problem, but many users still replay that they can’t do anything about their videos. How to tackle that? New Pavtube relevant Video converter software can handle this highest level video standard. XAVC can support 4K (4.96×2160 and 3840×2160), which just cater the trend of 4K.

    Add H.265/HEVC Decode and Encode:


    All Pavtube Video Converter Ultimate products have added the H.265/HEVC decode/encode. You may very family about H.264/MPEG-4, but may not know about this H.265/HEVC. Actually, those two codec are said to double the date compression at the same level of video quality. This H.265 can be said as the Intro Time of 4K Generation. This H.265/HEVC is considered not only play a remarkable role on improving the image quality but also can support 4K resolution to UHDTV, the highest level can up to 8192×4320 (8k). Like the hottest Samsung NX1 has already explore this brand new market. The 205-point phase-detection AF, 4K film resolution, H.265 compression coding, 15fps high-speed continuous shooting, etc., Samsung NX1 seems has already won the game. But with this fast update of the H.265 camera, the related peripheral support software seems not get enjoy strength. Many media player and NELs still stick on the H.264, so how to get your H.265/HEVC video into compatible while quality maintained? The brand new Pavtube relevant Video software will be the best solution to deal with the H.265/HEVC. No quality drop, fast conversion, smooth playback, all you need is in this new Pavtube. The Mac version is in full update, do please look forward to those brand new Pavtube relevant iMedia Converter for Mac!

    Merry Christmas^^

    About Pavtube Studio


    Founded in 2007, Pavtube creates expert multimedia software applications that help consumers access, transfer and share their digital content across different devices that range from PC, Mac, NLE softwares, tablets, smartphones, to HD media players, game consoles, and home theatre systems. On the basis of computer OS, Pavtube products are divided into two categories – Windows solutions and Mac solutions, spanning across BD/DVD saving, video transcoding, camera/camcorder footage, and DVR recordings (e.g. TiVo) conversion. With creativity, expert knowledge as well as cutting-edge technology, Pavtube helps consumers throughout the world enjoy more in a digitally connected audio-visual world. See http://www.multipelife.com and http://www.pavtube.com for more information. More info can be found here.

    Enjoy "A Christmas Story" Blu-ray freely on Mac Pro

    Want to watch "A Christmas Story" Blu-ray movie on Mac Pro? Pavtube BDMagic for Mac provides perfect solution for ripping protected Xmas Blu-ray to Mac Pro supported video formats in few clicks.

    "I just got a Christmas themed Blu-ray movie disc: A Christmas Story and plan to watch this Christmas Blu-ray movie on my new Mac Pro. I know Mac Pro doesn’t recognize Blu-ray. I’m looking for a solution to convert Christmas Blu-ray disc to my Mac Pro and retain the HD quality as much as possible. Is there any wonderful Blu-ray ripping software there?"
    Enjoy "A Christmas Story" Blu-ray freely on Mac Pro

    Playing Blu-ray Discs on a Mac computer is not as easy as on a Windows PC, as not a current Mac computer is not equipped with an internal Blu-ray Disc Drive and no built-in Blu-ray playing software either. So as mentioned above, what you need is to rip and convert A Christmas Story Blu-ray movie to a video format fitting for Mac Pro.

    To reach you goal, Pavtube BDMagic for Mac is the one that will fulfill your needs. It meets up OS X system requirement on any level with powerful Blu-ray disc ripping ability. It combines Blu-ray Ripper, DVD Ripper into one, which can help you rip/convert any Blu-ray disc, including A Christmas Story Blu-ray disc to Mac Pro supported videos with excellent and unmatchable ripping-converting speed while preserving HD quality. And with the disc copy feature, you not only can copy the full BD disc, but also can copy the main movies without any extras on Mac as you want. (Read the review)

    How to Rip and Convert A Christmas Story Blu-ray to Mac Pro?

    Step 1. Load Blu-ray to the software

    Insert the Blu-ray disc to Blu-ray drive as the source file. Launch the top Blu-ray Ripper for Mac; click the disc button to load the entire Blu-ray disc for ripping.

    top Blu-ray Ripper for Mac

    Tip: If you have backed up the entire Blu-ray disc on hard drive with BDMV file structure, you can also load the BDMV folder for conversion on Mac.

    Step 2. Choose output format

    Click the Format bar and follow Common Video; MP4, MOV, AVI, MPEG, M4V... are all the popular output formats for you. This Mac Blu-ray Riper also has 150+ presets for almost all popular multimedia devices. You are allowed to choose one device as the output format as well.

    Also learn how to backup your Blu-ray to Computer HDD, NAS and Plex server.

    mp4 video format

    Tip: The Blu-ray movie has more than one audio tracks and subtitles. You can choose your preferred one from the "Subtitles", "Audio" options retained in the output video.

    Step 3. Adjust video and audio settings (Optional)

    This Mac Mavericks Blu-ray Converter allows users to adjust video and audio parameters to customize the output file quality. Click "Settings" button and then you can adjust video resolution, frame rate, bit rate, audio channel, etc.

    Step 4. Start ripping Blu-ray on Mac

    Click "Convert" button to start converting Blu-ray movie to Mac Pro. After conversion click "Open" to find converted movie, and then you can play the output video Mac Pro freely.